To add some payment details to a booking, including Scheduled Payments and Vouchers—Click the Payments button on the right of the bill.

There are two options for recording payments:
- Manual Payments
These are isolated payments not connected to a specific date. When adding a manual payment, the date the payment was made is recorded on the bill and cannot be changed. - Scheduled Payments
These can control the amount and date the payments should be made until the balance of the bill is zero. These schedules can be created manually or follow rules that are set up in your automated Payment Schedules.
Adding Manual Payments
If you decide to add the payments manually you can click the light blue button to load the Point of Sale.

Type in the amount or use the blue (1) coloured numbers on the left (which are common denominations of banknotes). There is also the All (2) button which will add the total balance - useful when customers are paying in full. You can also use the 1/2 or 1/3 (3) buttons to split a payment in half or into thirds respectively. Or you can type a number and then press 1/n button to divide by that quantity and % (4) button to show that percentage of a payment, useful when inputting part payments or deposits. The first partial payment on a customer’s booking is classed as a deposit. On the far right are the payment methods. (5) These are configured in your Venue Settings. Select a payment method to record the payment, which will then be shown on the bill under the “Payments” heading. |  |
Adding Scheduled Payments
If you set up a payment schedule for your venue, when you click the Payment button on a bill you will be prompted to choose a payments schedule.
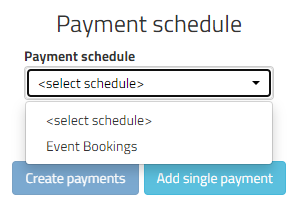
When you choose a schedule to use, a breakdown of the payments will be shown. If you are happy, you can click the “Create Payments” button.
If you want to create your own schedule or simply pay all at once you can click the “Add single payment” button.
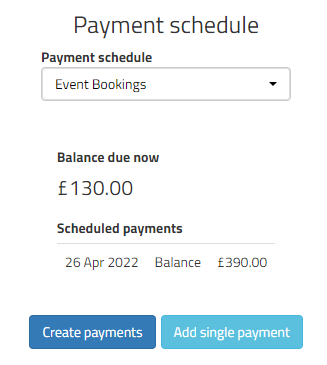
The initial payment amount will be automatically put into the total to charge, and you can then select your Payment Method. You will see the scheduled payments on the bill.
Any Manual Payments will be displayed on the Bill for that booking and Scheduled Payments will appear underneath them. Depending on how your Payment Reminder email is set up, the email could include a link for the customer to Pay online. If the customer gets in contact over the phone to pay the Scheduled Payment you MUST click the Pay button (7) to record the amount and pay off and complete the scheduled payment. If you need to amend a scheduled payment, e.g. the amount, date or remove it completely, click on the text of the Scheduled payment. |  |
Was this article helpful?
That’s Great!
Thank you for your feedback
Sorry! We couldn't be helpful
Thank you for your feedback
Feedback sent
We appreciate your effort and will try to fix the article