Clicking on Events in the Manage menu will bring up a list of your events, which you can select between upcoming and past events as well as yearly calendar view option.

There is also the ability to filter your events, by event type, category or venue. You can also export all your events in the current season to a spreadsheet.
Clicking on an Event will open that event to show the information, entries and reports connected to that it. You can also click on a class within that event, shown in the column on the right to go straight to the Entry List for that class.
Before you can create an event, you need a Venue, a Class and a Sport type set in your Account Settings.
To create an event, use the + New Event button at the top of the list.
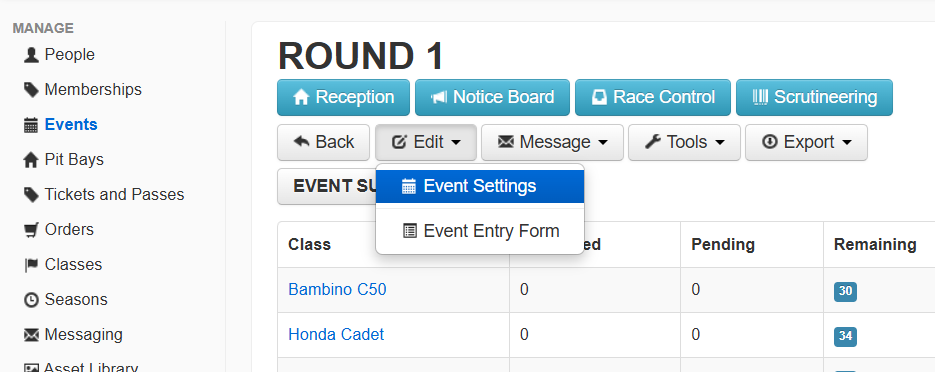
To edit an existing event, open an event and click the Edit button at the top of the event screen and select "Event Settings".
Basic Settings Set the date, time and name of your event in this section. You will need to specify whether the event is a Race Day (competitors will be scrutineered and tyres recorded) or a Test Day (no scrutineering and no tyre scanning). You can designate a short name for your event which will be used to truncate the name in tables on the system for easier viewing i.e. Round 1 would have the short name R1. Pick your venue from the dropdown. If you don't have or the venue isn't listed you will need to create a venue first. Then set the Event Category (if configured) and end if more than one day. Set the Time zone if required. |  |
Once you have configured all of these settings you are then ready to click the create/update button to save it. Clicking Update Event will send you to the next section of the Event Settings. You also have the option to just Update and Close the Event Settings page and return to the Event Summary page. You can also Cancel any changes you've made or Archive the event.

The following Event Settings sections are listed below. Click on them to learn more:
Was this article helpful?
That’s Great!
Thank you for your feedback
Sorry! We couldn't be helpful
Thank you for your feedback
Feedback sent
We appreciate your effort and will try to fix the article